Hi all! And welcome!
I am so excited to participate in this hop and I even made a "little" tutorial for you all to go along with the hop. My tutorial is going to be on my newest happy mistake. Something to know about me, whether you are new around here or not, is that I often make happy mistakes when I am creating. In this case I was trying to make very cool block from a tutorial, but using parallelograms instead of half square triangles and instead created my own block, I am sure someone else has done this before, but it was my happy mistake so I am going to share it with you. I am going to call this the ups and downs block.
However, before we get started on the tutorial, let me take a moment to introduce myself. My name is Jenn. I am the Jenniffier behind Jenniffier's Sometimes Creative Life. My blog is more or less a journal of me being creative - sometimes. Most the time, the blog posts center around quilting. Sometimes, the posts are about sewing, cooking, teaching, technology photography, creating in general and other random life type things that are interesting me at the moment. But as I said before mostly quilting or my lack of progress on quilting if I want completely honest. Just like most everyone else out there I have periods of creativeness and periods where can't seem to accomplish anything.
However, if you want to see all that I have created you can check out my sewing page, my completed quilts page, and my tutorial page. But just in case you don't have time to jump around here is a mosaic of some of my favorite items that I have share with everyone on this blog.

There is lots more projects hiding around here and lots more to come. So if you have time and you haven't taken a look around, please do.
Q and A Time!
Lets just take a moment to learn just a little more about the actual me behind the blog. If you want to learn a lot more about me and how I started quilting check out my about me page. I personally think that always hard to start writing about yourself, luckily there were some questions, but first I think most importantly to know is that I live with my two German Shepherd dogs, Suzie and Gus (Suzie is the little one) and my loving husband Randall.
Ok back to Q and A
Now if this wasn't a long enough post yet, lets get on with that tutorial.
Ups and Downs quilt block Tutorial
To make one block you will need 4 focus fabrics and one background fabric.
I made this block using my accuquilt go cutting system. I used the GO! Half Square-3" Finished Triangle and GO! Parallelogram- 3 3/4" x 3 1/2". If you don't have these don't worry I will tell you how to cut the parallelogram with out the accuquilt die. You will need 16 Half Square-3" Finished Triangle and 8 Parallelogram.
If you are using the accuquilt the cut your strips to 4 1/2 inches. Then place the strips on die just like you cut them, with wrong sides together.

Stack your fabric and send it on through by just turning the little knob. Then be amazed at how quick it cut.

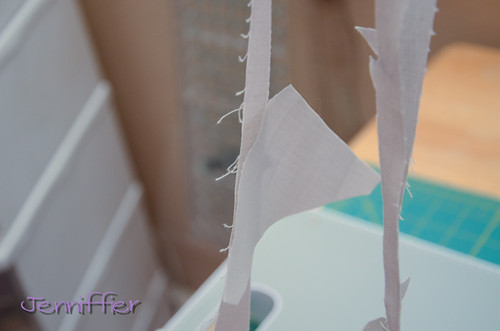
Repeat the process for your remaining fabrics. Notice how small the top piece is, it was a scrap from another project, you just have to make sure that it fabric is big enough to cover the shape on the die.
Now sometimes when you send your fabric through a couple pieces get stuck on one thread. Cut those with scissors Don't make my mistake and pull at it or you too will learn the hard way of why you shouldn't do that.
Now lets take a quick moment to talk about how much fabric the accuquilt wasted since that was a big concern before I purchase, ok fine, asked for it for Christmas.
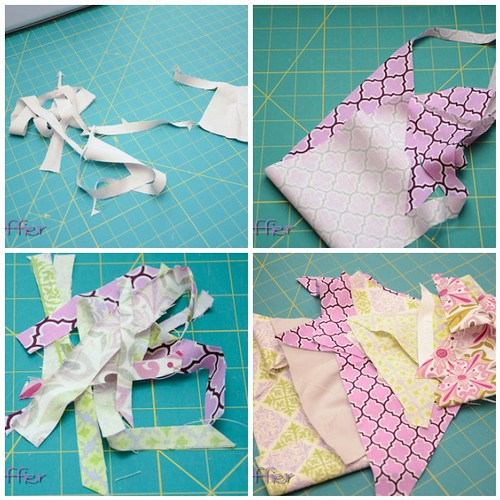
In this mosaic the pictures on the left are what I threw away and the bottom right picture is what went into my scrap pile. Oh yeah and let me just mention this is so not a sponsored post, I am just sharing what I did and the tool that I used to do it.
Ok so now if you don't have an accuquilt you will have to cut these parts all by hand. It really isn't that hard. For your triangles cut 3 7/8 inch squares and cut them diagonally in half. For the parallelogram cut an 2 5/8 strip then line the long part of the strip up with your 45 degree on your ruler. Take one cut at the end then move it over 3 1/2 and cut again. If that doesn't make since look at the picture and try it once. It really does magically work. Sometimes it helps to use the grid lines on your mat to make sure the strip is straight first.

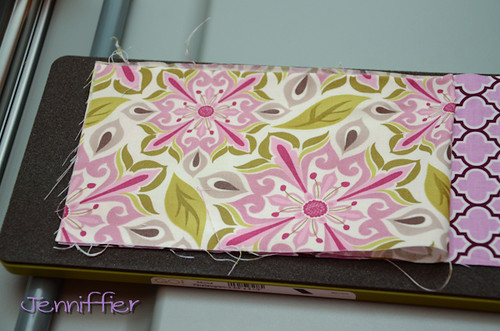
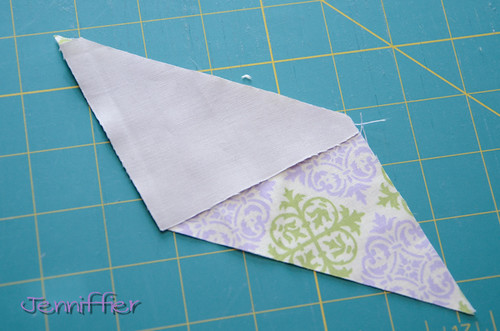
The tricky part to sewing is figuring out what side of the parallelogram to line the triangle up with. Once it looks like the picture, and the long parts are together, sew one triangle on to each of the eight pieces.
The press and sew the other eight triangles to your unit.

Press again and you have each of your rectangle units.

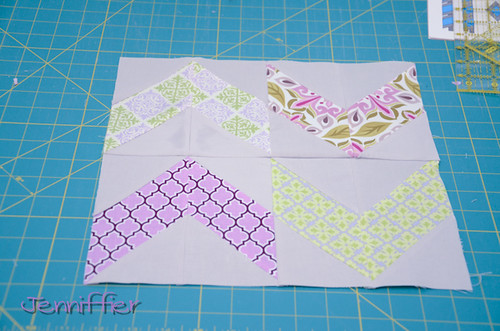
Take two of the same print rectangle units and sew them together so that they look like a point. This will be your square unit. Repeat with the other 3 colors to make 4 square units.

Take your 4 square units and arrange them so two points are going up and two points are going down.

Sew one up to one down, and then repeat. Then sew the two large rectangles together to make the ups and downs block. One quick tip for making this block starch a lot. there are lots of bias angles in play and if you aren't careful it can get very wonky very quickly.

I am so excited to participate in this hop and I even made a "little" tutorial for you all to go along with the hop. My tutorial is going to be on my newest happy mistake. Something to know about me, whether you are new around here or not, is that I often make happy mistakes when I am creating. In this case I was trying to make very cool block from a tutorial, but using parallelograms instead of half square triangles and instead created my own block, I am sure someone else has done this before, but it was my happy mistake so I am going to share it with you. I am going to call this the ups and downs block.
|
| *if you really just want the tutorial scroll down to the bottom until you see this picture again |
However, before we get started on the tutorial, let me take a moment to introduce myself. My name is Jenn. I am the Jenniffier behind Jenniffier's Sometimes Creative Life. My blog is more or less a journal of me being creative - sometimes. Most the time, the blog posts center around quilting. Sometimes, the posts are about sewing, cooking, teaching, technology photography, creating in general and other random life type things that are interesting me at the moment. But as I said before mostly quilting or my lack of progress on quilting if I want completely honest. Just like most everyone else out there I have periods of creativeness and periods where can't seem to accomplish anything.
However, if you want to see all that I have created you can check out my sewing page, my completed quilts page, and my tutorial page. But just in case you don't have time to jump around here is a mosaic of some of my favorite items that I have share with everyone on this blog.
There is lots more projects hiding around here and lots more to come. So if you have time and you haven't taken a look around, please do.
Q and A Time!
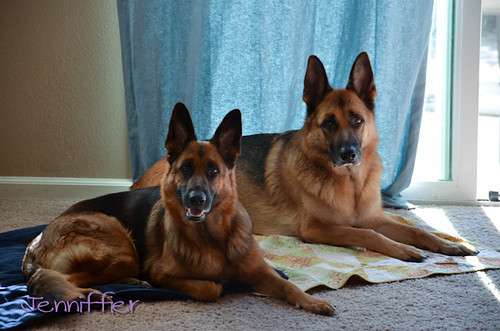
Lets just take a moment to learn just a little more about the actual me behind the blog. If you want to learn a lot more about me and how I started quilting check out my about me page. I personally think that always hard to start writing about yourself, luckily there were some questions, but first I think most importantly to know is that I live with my two German Shepherd dogs, Suzie and Gus (Suzie is the little one) and my loving husband Randall.
Ok back to Q and A
- How long have you been quilting?
About 13 years on and off. I started when 18. When to college and took a 4 year break from quilting. I would often visit local quilt stores, I even collected fabric, but I really didn't touch my sewing machine. However, started quilting again right after graduation and then when straight into my teacher credential program. I tried to keep quilting but it rarely happened. Then I became a teacher. I would sometimes try and sew but mostly I would take everything out, fondle it, and put it back. Fast forward about 5 years. I had become one very stressed out teacher who spent all of my time being a teacher. I had let teaching define me. There was one day in particular that this became very apparent. I decided to go see a personal trainer. He had this long questionnaire and he went over them he asked me what I do to help with the stress, which I marked as a five, and I stared at him blankly. He then asked if I had any hobbies and I couldn't think of anything I enjoyed doing other than teaching and that was what was causing my stress. So I thought and I thought and realized I used to like quilting. So I started quilting again and have been ever since.
- Favorite quilting tip?
I use a spray bottle with 1/3 vodka and 2/3 water as my pressing agent. It works great! Just shake it up and spray. The vodka gives a starchy effect with out being too much. BTW the cheapest vodka works best.
- Favorite blogging tip ?
Don't wait until 10:00 pm to start your post for the next day. Not that I ever do that.
- Favorite fabric ?
Oh no, don't even get me started on that. There is so much that I want right now. I even have some gift cards, but I just can't make up my mind on what I really want to get.
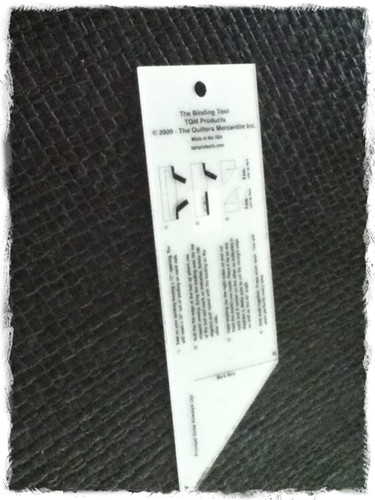
- Favorite quilting tool ?
The binding tool. I gave one away a bit back because I enjoy it so much. Basically it allows you to make your binding match up perfectly.
- Favorite Children's Book -
I have four. I do teach elementary school and I was an English major, so needless to say I love books. I have my favorites to read to my classes, but these are my own personal favorites. Alice and Wonderland at first it was the Disney movie, but then I actually read the book and really enjoyed it. Winnie the Pooh. A.A. Milne was a wonderful author and really made the characters come to life. Mog the Cat - it is about this very forgetful cat who gets in lots of trouble and keeps saying and they haven't even fed me my supper, but in the end he wins an award for protecting the house. My favorite part about the book is the US version says "drat that ca"t but the original UK version says "bother that cat". And finally Peter Rabbit. I had that read to me so many times that my mom can still tell you almost the whole story without even picking up the book.
Now if this wasn't a long enough post yet, lets get on with that tutorial.
Ups and Downs quilt block Tutorial
To make one block you will need 4 focus fabrics and one background fabric.
I made this block using my accuquilt go cutting system. I used the GO! Half Square-3" Finished Triangle and GO! Parallelogram- 3 3/4" x 3 1/2". If you don't have these don't worry I will tell you how to cut the parallelogram with out the accuquilt die. You will need 16 Half Square-3" Finished Triangle and 8 Parallelogram.
Repeat the process for your remaining fabrics. Notice how small the top piece is, it was a scrap from another project, you just have to make sure that it fabric is big enough to cover the shape on the die.
Now sometimes when you send your fabric through a couple pieces get stuck on one thread. Cut those with scissors Don't make my mistake and pull at it or you too will learn the hard way of why you shouldn't do that.
Now lets take a quick moment to talk about how much fabric the accuquilt wasted since that was a big concern before I purchase, ok fine, asked for it for Christmas.
In this mosaic the pictures on the left are what I threw away and the bottom right picture is what went into my scrap pile. Oh yeah and let me just mention this is so not a sponsored post, I am just sharing what I did and the tool that I used to do it.
Ok so now if you don't have an accuquilt you will have to cut these parts all by hand. It really isn't that hard. For your triangles cut 3 7/8 inch squares and cut them diagonally in half. For the parallelogram cut an 2 5/8 strip then line the long part of the strip up with your 45 degree on your ruler. Take one cut at the end then move it over 3 1/2 and cut again. If that doesn't make since look at the picture and try it once. It really does magically work. Sometimes it helps to use the grid lines on your mat to make sure the strip is straight first.
The tricky part to sewing is figuring out what side of the parallelogram to line the triangle up with. Once it looks like the picture, and the long parts are together, sew one triangle on to each of the eight pieces.
Press again and you have each of your rectangle units.
Take two of the same print rectangle units and sew them together so that they look like a point. This will be your square unit. Repeat with the other 3 colors to make 4 square units.
Take your 4 square units and arrange them so two points are going up and two points are going down.
Sew one up to one down, and then repeat. Then sew the two large rectangles together to make the ups and downs block. One quick tip for making this block starch a lot. there are lots of bias angles in play and if you aren't careful it can get very wonky very quickly.
I hope you enjoyed getting to know me a bit better and my tutorial. If you want to get to know some more bloggers go visit: Kerstin from Sunset Sewing she is also posting today.
Tracey from The Peony Teacup
Megan from City Stitches
Oct 25
Kerstin from Sunset Sewing
Jenniffier from Jenniffier's Sometimes Creative Life
Oct 30
Shena from Apple Pie Patchwork
Janice from better off thread
Here is the most recent schedule for the:
Oct 23Tracey from The Peony Teacup
Megan from City Stitches
Oct 25
Kerstin from Sunset Sewing
Jenniffier from Jenniffier's Sometimes Creative Life
Oct 30
Shena from Apple Pie Patchwork
Janice from better off thread
Or follow the link to see the schedule of all the bloggers, which are lots because this hop started in may:
So nice to have a hobby that lets you take a little bit of time for yourself :)
ReplyDeleteYour Ups and Downs block looks great!
Hi Jenn, love your tutorial, I've been wondering about asking Santa for an Accuquilt so it was really great to see photos of you using it. Love your choice of children's books - my favourite Judith Kerr is 'The Tiger Who Came To Tea', and your bringing back lovely memories of when my children were little! Good to find out more about you today :)
ReplyDeleteWhat a happy mistake indeed, nice tutorial! I'm happy to share this day on the blog hop with you and it was nice to get to know more about you.
ReplyDeleteHi Jennifer. Nice fabric choices on your projects.
ReplyDeleteI was hoping Santa would get me an Accuquilt but have been concerned about fabric waste.
You have made some lovely things and this is such a lovely block. thanks for sharing.
ReplyDeleteI love the books that you chose, I was given a copy of all of AA Milne's stories on my Christening and I still love them :D
ReplyDeleteYour block is also so cute
Hi Jennifer, nice to meet you. I love happy mistakes too. Great tutorial.
ReplyDeleteNow I want to get me an Accuquilt.
Hi there, lovely to meet you. I am a teacher too, and I love books as well, not to mention quilting, so I guess we have a lot in common! Your tutorial is great and I love the fabrics too.
ReplyDeleteWhat a fun block! Love it!
ReplyDeleteAlso, A.A. Milne is awesome. I love the original Pooh books! :)
It's great to read a little more about you Jenniffier. :) I also started sewing and quilting as a stress reducer right after finishing grad school. It's amazing how a little creative therapy can help.
ReplyDeleteNice to get to know you! Love your ups and down! It was a great mistake.
ReplyDeleteI loved all your quilts, but I especially loved the little quilt in the corner with the tree and the kite. The dogs are pretty cute too.
ReplyDeleteI too, LOVE the binding tool. So wonderful to meet you!
ReplyDeleteI've never used the binding tool before.. might need to look into it - the way I do binding seems so convoluted!
ReplyDeleteIt was nice to meet you, btw :) I love my accuquilt too!
Hi Jenn, nice to meet you on the blog hop. Your happy mistake is lovely. Thanks for the tutorial. I taught fourth grade for several years before moving to Japan last year. Teaching can be all consuming .... Quilting is a great creative outlet and a way to strike a good balance!
ReplyDeleteHi Jenn, so nice to meet you. You have some beautiful projects, but I especially LOVE your dogs...I want to snuggle right up with them. Thanks for the great tutorial.
ReplyDeleteAmanda
Nice to meet you! I like the block. Great looking dogs.
ReplyDeleteGreat post and tutorial Jenn! I never heard of that starch tip before!
ReplyDeleteYour dogs looks so nice. Thanks for sharing on the blog hop. ;)
ReplyDeleteNice to meet you . . . love the tutorial and your take on "happy" mistakes. Hope your stress level has gone down with the your quilting.
ReplyDelete